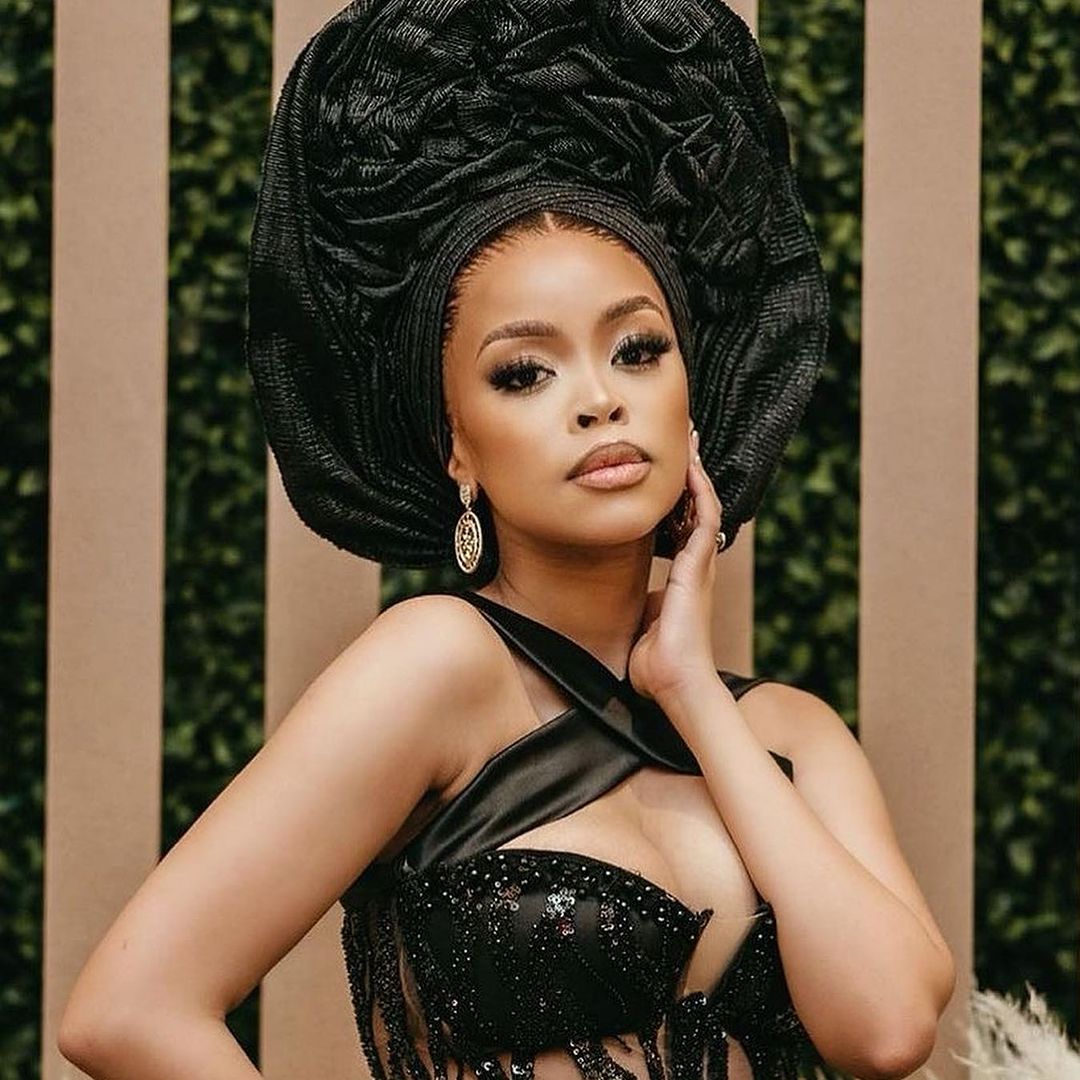
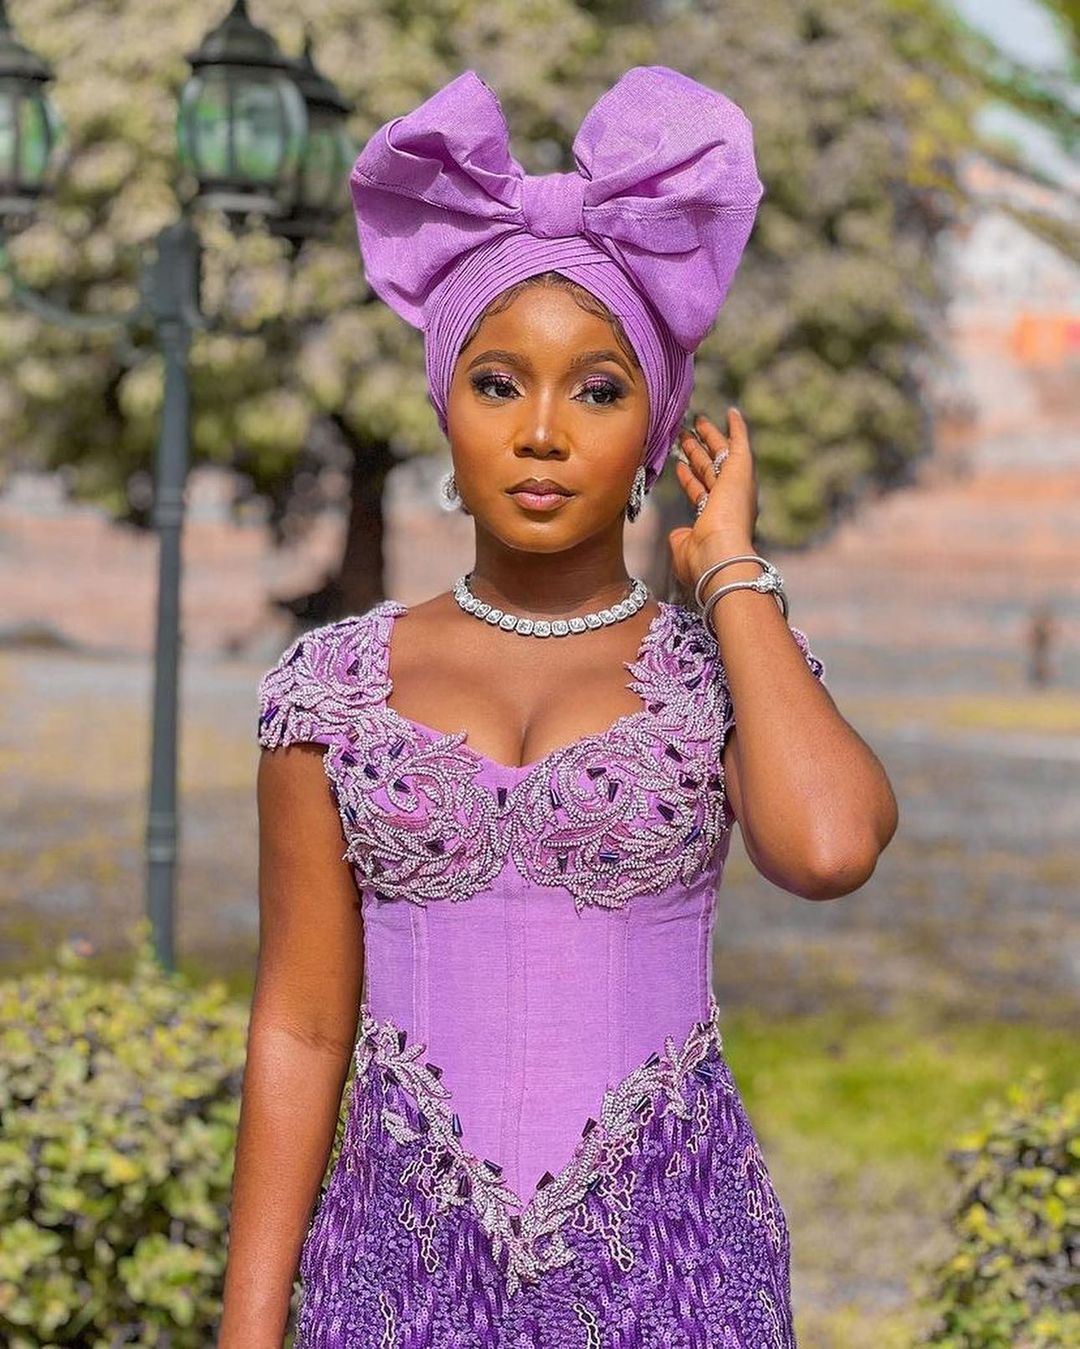
In Nigeria, the festive season is synonymous with vibrant celebrations, elaborate events, and many weddings. One of the most captivating aspects of these occasions is the exquisite and culturally significant headwraps, commonly known as Gele. These headpieces are a fashion statement and a symbol of elegance, tradition, and celebration.
Wearing a Gele during festive events is more than just a style choice; it is a nod to the African culture and showcases pride in one’s identity. The Gele is an intricately tied piece of fabric that varies in style, colour, and pattern. It is important during traditional weddings and other ceremonies Nigerians call “owambe”. Geles are meticulously selected for events to complement our outfits, and the art of tying a perfect Gele is considered a skill even more than other head-wraps. This is also because the Gele comes in various fabric textures and is not so easy to manipulate into a beautiful outcome without that skill.
Why you should learn to DIY a Gele
While many turn to professional stylists for the perfect head-wraps, understandably so, there’s an empowering joy in being able to create your own stunning Gele. This skill allows for greater flexibility in choosing your style of head-wraps and comes in handy during those last-minute preparations for events. Imagine the satisfaction of tying a beautiful Gele that complements your attire without needing external assistance. However, there are certain mistakes rookies like us make, here is how to avoid them.
Common mistakes when tying a Gele
- Incorrect folding: Beginners often struggle with folding the gele fabric properly, leading to uneven layers and an unstable foundation. To avoid this, ensure you get a smooth and even fold to create a stable base for your gele.
- Tightness: Tying the Gele too tightly can cause discomfort and headaches. Strike a balance between snugness and comfort to ensure a secure fit without unnecessary pressure on the head.
- Inadequate fabric length: Using insufficient fabric length may result in a small and poorly-formed gele. Measure and cut the fabric appropriately, accounting for both the head size and desired style.
Beginner-friendly tips for tying a Gele
- Keep it simple: Start with basic tying styles before attempting more intricate designs. This allows you to master the fundamentals and build confidence gradually.
- Use firm fabric: Select a fabric with a firm texture for your Gele. This makes it easier to handle and creates more defined pleats, giving a neater finish.
- Secure with Hairpins: Use hairpins to secure the Gele in place while tying. This prevents it from slipping or coming undone throughout the day, ensuring long-lasting and comfortable wear.
- Watch tutorials: Leverage online tutorials from experts. Pay attention to their techniques and replicate the steps to enhance your tying skills.
For this DIY tutorial, we’ve collaborated with Tolulope Adedara, popularly known as Tolulope Onigele, a seasoned headgear stylist and the founder of Oni Gele Crafts. His art has graced the heads of some of your favourite celebrities such as Kate Henshaw, Tomike Adeoye, Omowunmi Dada and Precious Okoye. In this tutorial, Tolu shows us how to tie Gele head-wraps like a pro.

How to tie Gele head-wraps
Style 1: The 50/50 twist
Materials Needed:
– 2 yards of fabric (Ankara or any material of your choice)
Steps:
- Start by folding the fabric into two halves.
- Place the middle point at the back of the head, ensuring the right and left sides are equal – 50/50.
- Twist the ends twice, first to the left and then to the right.
- Bring both ends to the back and twist once.
- Tuck both ends in, ensuring they are well arranged.
In just 2 minutes, you have a beautifully tied Gele, and it can also be gently removed to be placed on the side as a cap.
Style 2: The classic easy bow
Materials Needed:
– 2 yards of fabric (using a 30/70 formula)
Steps:
- Divide the material into three equal parts.
- Position the first point on the right and the second on the left.
- Bring both sides to the front, ensuring one side is longer – 30/70.
- Tie the 30 around the 70 tightly.
- Take the 30 to the back and tuck it in.
- Pleat the 70 side horizontally and bring out the tucked-in 30 part.
- Cover the middle of the pleated 70 with the 30 side and pin it down.
- Style both sides creatively using pins.
With these simple steps and tips, you can create stunning headwraps that enhance your festive look and carry you through your events in the new year. The flexibility to use any material/fabric opens up endless possibilities for expressing your styling creativity.
To envision these styles properly, our DIY tutorial video with Tolulope Onigele is a must-watch for anyone looking to master the art of Gele tying. Let us know which styles you’ll be willing to try out at your next Owambe.